-
- CNC Panel SawCNC Router MachineAutomatic Edge Banding MachineSix Sided CNC Drilling Machine
- Application
![news]()
How Should a Scoring Blade Be Set for Laminated MDF Cutting?
Views: 0 Author: Site Editor Publish Time: 2026-10-29 Origin: Site
![facebook sharing button]()
![twitter sharing button]()
![line sharing button]()
![wechat sharing button]()
![linkedin sharing button]()
![pinterest sharing button]()
![whatsapp sharing button]()
![sharethis sharing button]()
Introduction
Imagine pulling a pristine sheet of double-sided melamine off the saw, only to find the bottom edge looks like it was chewed by a rat. It is a nightmare for your margins. One of the most persistent challenges in professional panel processing is preventing chipped edges when cutting brittle materials. Laminated surfaces are engineered for durability. However, their composite nature makes them incredibly fragile under mechanical stress. When a standard main saw blade exits the bottom of a panel, the upward force of the teeth causes the melamine layer to blow out. The result is a jagged, unacceptable finish.
Without correct bottom support, these surfaces easily shatter. The empirical solution to this mechanical problem is integrating a scoring blade. Understanding exactly how this secondary blade should be set is the critical difference between amateur stock-wasting and factory-grade flawless edges. A proper scoring unit pre-cuts the bottom layer. This allows the main blade to pass through the material without exerting upward stress on the laminate.
Whether you are operating a traditional sliding table setup or a highly advanced MDF panel saw, the fundamental principles of calibration remain identical. In this comprehensive guide, we will break down the exact mechanical steps to achieve perfectly clean cuts every single time.
Industry Shift: The Demand for Zero-Defect Edges
Looking at the current panel processing landscape, the tolerance for edge defects has completely vanished. The booming demand for ready-to-assemble furniture means every cut must be edge-bander ready straight off the saw. Shops are moving away from manual workarounds like masking tape or zero-clearance inserts. Instead, they are investing heavily in precision scoring systems. The math is simple. Wasted material and manual rework cost far more than proper machine calibration. Today, high-speed, flawless processing is the baseline standard for survival in the woodworking industry.
Key Takeaways for Machine Operators
Depth is Minimal: A scoring blade should only penetrate 1mm to 2mm into the board. This is just enough to break the brittle surface tension without straining the secondary motor.
Width Matters: The scoring kerf must be set slightly wider, roughly 0.1mm to 0.2mm, than the main blade. This prevents the main teeth from clipping the bottom edge.
Perfect Alignment: The scoring unit must sit perfectly centered on the same axis as the main blade to avoid visible stepped cuts.
Blade Types: Differentiating between split and conical scoring blades is essential for accurate mechanical setup.
![MDF Panel Saw Scoring Blade Setup]()
Understanding the Role of a Scoring Blade
To master the setup process, operators must first understand the mechanical physics of a dual-blade cutting system. When processing sheet goods, the sequence relies on two distinct blades working in tandem. Yet, they rotate in opposite directions.
The main saw blade rotates toward the operator, cutting the material from the top down. As it exits the bottom of the board, the teeth push upward. If the bottom layer is unsupported, this upward force shatters the laminate. In contrast, the scoring blade sits directly in front of the main blade. It operates in a climb-cutting motion, rotating in the same direction that the material is being fed.
Specifically, this rotational force allows the scoring blade to create a shallow, precise channel in the bottom laminate layer before the main blade arrives. Because it climb-cuts, it presses the laminate upward against the dense wood-fiber core as it slices. This ensures a clean shear without blowout. Think of it like a glass cutter. Before you snap a pane of glass, you must score the surface to create a clean break line. The scoring blade performs this exact function safely.
Split vs. Conical: A Practical Selection Guide
When configuring a laminated board cutting machine, operators generally choose between two distinct types of scoring blades. Selecting the correct type depends heavily on your specific machinery and your shop's workflow.
Blade Type
Adjustment Method
Pros
Best Application Scenario
Conical
Height-based. Raising the blade widens the kerf.
Fast adjustments via external machine dials. No disassembly required.
High-paced production environments processing varying material thicknesses.
Split
Shim-based. Adding metal spacers between two blade halves widens the kerf.
Consistent depth regardless of kerf width. Highly mechanically stable.
Precision custom shops running long batches of identical sheet goods.
Conical scoring blades feature a unique tapered tooth geometry. The teeth are narrower at the bottom and gradually widen toward the top. Because of this design, adjusting the kerf is directly tied to the blade height. However, operators must be careful not to cut too deeply into the core material, which causes premature carbide wear.
Furthermore, split scoring blades consist of a two-piece design. They are essentially two thin blades mounted side-by-side. To adjust the width, the operator physically separates the two halves and inserts ultra-thin metal shims. While this process takes longer, it provides exact, mechanical consistency.
Step-by-Step Engineering Guide: Calibration Procedures
Achieving a flawless edge requires meticulous calibration. Picture this scenario on the shop floor. You are halfway through a stack of expensive melamine, and suddenly the bottom edge starts blowing out. Before reaching for the wrenches, follow this objective procedure to ensure your setup is empirically reliable.
Safety and Spindle Inspection
Before initiating any physical adjustments, completely disconnect the machine from its primary power source and lock out the switch. Inspect both blades. They must be exceptionally sharp and free of dark resin buildup. Because melamine resin is highly abrasive, scoring blades dull much faster than main blades. A dull tooth will crush the laminate rather than shear it, causing chipping regardless of perfect alignment.
Setting the Depth Profile
The depth of the scoring cut is a critical metric. The objective is to pierce the bottom laminate layer and just barely scratch the MDF core. Adjust the arbor height so the scoring blade protrudes no more than 1mm to 2mm above the cast iron table.
Setting the blade too high is a frequent operational error. Excessive depth generates unnecessary friction, accelerates the dulling of the carbide tips, and puts undue strain on the secondary motor. Lower the blade until it is flush, then slowly raise it while measuring the exposure with a precision depth gauge.
Dialing in the Kerf Width
The most vital mathematical rule of this setup is that the scoring kerf must be fractionally wider than the main blade kerf. Ideally, it should be 0.1mm to 0.2mm wider in total. This provides a tiny overhang on each side, creating a safe relief channel.
If utilizing a split blade, measure the main blade teeth with digital calipers. Next, assemble the split blade with the appropriate shims to exceed that measurement. If utilizing a conical blade, achieve this width by adjusting the height incrementally until the tapered teeth create a slightly wider channel.
Perfecting the Lateral Alignment
Listen closely, width and depth mean absolutely nothing if the two blades are not perfectly aligned on the same central axis. The scoring unit must sit dead-center in relation to the main blade. Use the lateral adjustment knobs to shift the scoring arbor horizontally. If the scoring blade is shifted even a fraction of a millimeter off-center, the resulting cut will feature a noticeable ridge along the bottom edge.
Equipment Selection: Specs That Actually Matter
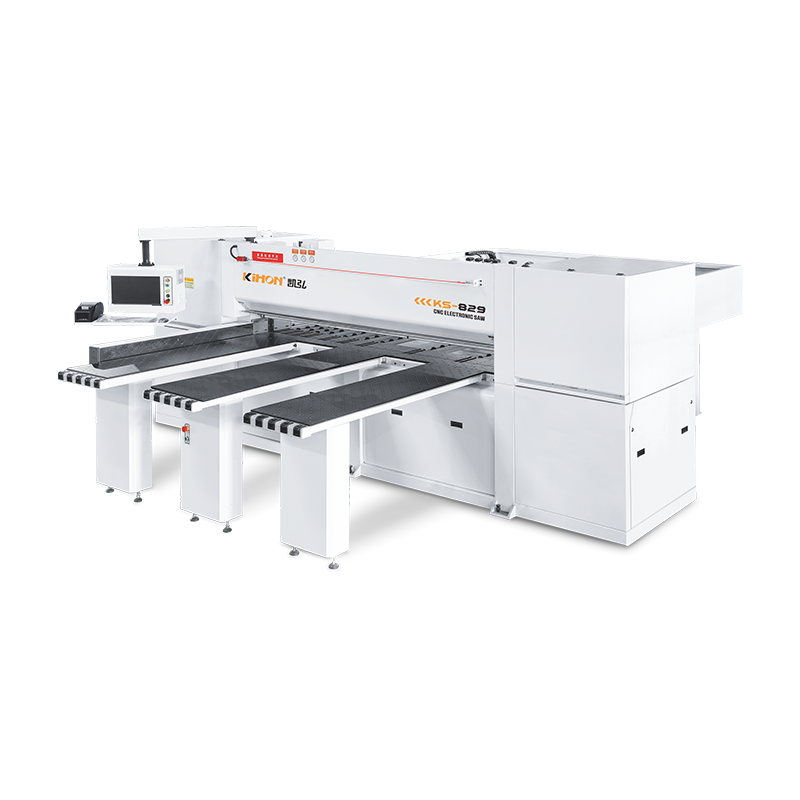
The procedures outlined above highlight the precise nature of machine calibration. For entry-level machines, adjusting a scoring blade requires constant manual tweaking with hex keys and endless test cuts. If you want to eliminate this downtime, the mechanical specifications of your saw are paramount.
When evaluating a modern particleboard CNC panel saw, look directly at the motor and spindle parameters. A professional-grade machine will feature an independent scoring motor, typically rated around 1.1kW. This dedicated power allows the scoring blade to spin at a blistering 8000 RPM. High rotational speed is non-negotiable for cleanly shearing brittle melamine.
In addition, check the spindle runout. High-end equipment maintains an arbor runout of less than 0.02mm. If the spindle wobbles beyond this tolerance, your scoring kerf will fluctuate, completely destroying the clean edge you just spent time calibrating. Automated models now replace manual shims with digital precision, utilizing servo motors to adjust lateral alignment in increments as small as 0.01mm directly from a touchscreen.
Troubleshooting Real-World Cutting Defects
Even with careful initial setup, environmental factors and gradual machine vibration can cause cut quality to degrade over time. Utilizing a systematic troubleshooting approach minimizes your shop downtime.
Chipping on One Side of the Bottom Edge
This specific defect indicates incorrect lateral alignment. The scoring blade has shifted too far away from the side that is chipping. It is failing to protect one side of the kerf while over-cutting the other. Inspect the cut to determine which side is blowing out, then shift the scoring blade slightly toward the damaged side. Perform micro-adjustments until the cut is symmetrical.
A Stepped or Grooved Edge
A visible groove occurs when the scoring kerf is set significantly wider than necessary, or when a conical blade is cutting too deep into the material. If using a split blade, remove the thinnest shim. If using a conical blade, lower the blade height slightly to reduce the effective width. Always re-check the lateral alignment afterward.
Burn Marks or Smoking During the Cut
Burning is typically caused by extreme friction. This results from a severely dull scoring blade, heavy glue buildup on the teeth, or an incorrect feed rate. First, verify the blade is clean using a specialized resin solvent. If the blade is pristine but still burning the wood, the carbide teeth have lost their micro-edge and must be sharpened.
Essential Blade Requirements and Maintenance
The success of a scoring setup relies heavily on the geometry of the main blade it is paired with. Standard woodworking blades intended for ripping solid lumber are entirely unsuitable for laminated boards. Their aggressive tooth angles cause severe tear-out.
For melamine and laminated MDF, the industry standard is a Triple Chip Grind main blade. This configuration alternates between a flat-top tooth and a trapezoidal tooth that is chamfered on the corners. This specific geometry distributes the cutting force evenly, significantly reducing physical shock.
Maintenance extends the lifespan of your tooling. MDF and particleboard contain high volumes of synthetic glues. Heat causes these adhesives to melt and bond to the carbide teeth. Soak your blades in an industrial citrus-based solvent weekly to dissolve pitch. Never use harsh wire brushes. Furthermore, establish a proactive sharpening schedule. The scoring blade cuts through the hardest outer layer, which often contains aluminum oxide, meaning it dulls twice as fast as the main blade.
Conclusion
Setting a scoring blade correctly is the foundational skill for processing laminated materials without edge chipping. It requires strict adherence to three main engineering pillars. You must maintain a shallow depth of one to two millimeters, keep the kerf slightly wider than the main blade, and ensure dead-center lateral alignment.
While mastering manual setup saves time and reduces waste, the physical limitations of older equipment can quickly become a production bottleneck. Stop letting chipped edges eat into your profit margins. If your current equipment cannot hold these tight tolerances, it is time for an upgrade. Visit Kihon Machine to explore our lineup of precision CNC panel saws engineered for flawless, edge-bander-ready cuts, bringing automated precision directly into your workflow.
FAQ - Frequently Asked Questions
Can I cut laminated MDF without a scoring blade?
Yes, hobbyists sometimes use temporary workarounds like applying masking tape over the cut line or installing a specialized high-tooth-count melamine blade. However, these methods are highly inconsistent and slow. For professional, high-volume, and guaranteed chip-free results, a machine equipped with a dedicated scoring unit is absolutely mandatory.
What happens if the scoring blade rotates the wrong way?
If a scoring blade is installed backwards or the motor is wired incorrectly, it will cut in a conventional downward motion rather than a climb-cut. This completely defeats its purpose. Instead of pressing the fragile laminate up against the solid core, it will rip the laminate downward, causing massive blowout and tear-out along the entire bottom edge.
How deep should a scoring blade cut?
Empirical guidelines dictate that a scoring blade should only cut deep enough to pierce the outer laminate layer. In practice, this translates to a depth of 1mm to 2mm. Cutting any deeper provides no structural advantage, strains the motor, and causes premature carbide wear.
What is the ideal RPM for a scoring blade?
To cleanly shear brittle melamine without chipping, a scoring blade needs high tip speed. The ideal spindle speed for a standard 120mm scoring blade is between 7,000 and 8,000 RPM. This high velocity ensures the carbide teeth slice through the abrasive laminate layer instantly before the material can fracture.
How often should I sharpen my scoring blade?
Maintenance schedules depend heavily on production volume and material type. As a general rule, scoring blades require sharpening much more frequently than main blades. Because it continuously grinds against the hardest abrasive outer layer of the resin, it loses its micro-edge rapidly. In a commercial setting, inspect the blade weekly and expect to sharpen it twice as often as your primary blade.

![English]()
![zhifufuben]()