-
- CNC Panel SawCNC Router MachineAutomatic Edge Banding MachineSix Sided CNC Drilling Machine
- Application
![news]()
What Is the Process of Edge Sealing in Furniture Production
Views: 0 Author: Site Editor Publish Time: 2026-07-31 Origin: Site
![facebook sharing button]()
![twitter sharing button]()
![line sharing button]()
![wechat sharing button]()
![linkedin sharing button]()
![pinterest sharing button]()
![whatsapp sharing button]()
![sharethis sharing button]()
Exposed composite substrates in panel furniture represent a critical vulnerability on the factory floor. Left untreated, these raw edges lead to moisture ingress, structural degradation, and unacceptable VOC emissions. Manufacturers face a constant tension between production throughput and edge quality. Inconsistent sealing results in high scrap rates, warranty claims, and compromised aesthetics that degrade brand trust.
While some use the term to describe manual finishing of solid live-edge wood, this guide focuses strictly on industrial applications. We examine the automated edge banding of composite panels like MDF, particleboard, and plywood. Evaluating the right Edge Sealing Process requires a technical understanding of adhesive chemistries, material compatibility, and machine calibration. Mastering these elements ensures long-term durability and operational efficiency.
Adhesive selection dictates durability: The choice between EVA, PUR, and Laser/Zero-Joint technologies determines the moisture resistance and thermal stability of the cabinet edge process.
Automation requires precise calibration: A successful edge sealing machine relies on synchronized stations—from pre-milling to final buffing—to minimize rework and material waste.
Material matching is critical: Pairing the correct substrate with appropriate PVC sealing, ABS, or veneer impacts both the physical protection and the final panel finishing quality.
Environmental control prevents defects: Factory temperature, humidity, and board acclimatization are as vital to a seamless edge as the machinery itself.
Defining the Edge Sealing Process in Panel Furniture
Core Objectives and Success Criteria
The primary goal involves creating a robust moisture barrier. Preventing water absorption stops substrate swelling. This protection proves vital in kitchen and bathroom cabinetry where humidity fluctuates constantly. Another objective is VOC containment. The process encapsulates formaldehyde and other off-gassing chemicals inherent in composite boards. Proper encapsulation helps manufacturers meet strict indoor air quality compliance standards like CARB Phase 2 and EPA TSCA Title VI.
Aesthetic integration remains equally important. The goal is creating a monolithic appearance mimicking solid materials. You achieve this through precise color and texture matching. A flawless edge makes engineered wood indistinguishable from premium solid stock. Operators must monitor the glue line thickness constantly. A visible glue line ruins the illusion of a solid piece. We aim for a zero-joint appearance whenever possible.
Achieving these criteria requires strict adherence to operating parameters. You cannot simply turn on the machine and run boards. You must verify the ambient temperature, the board temperature, and the adhesive temperature. Any deviation results in a failed bond. We test adhesion by attempting to manually peel the banding off a test piece. If the banding pulls wood fibers with it, the bond is successful. If it peels away clean, the process failed.
Distinguishing Industrial Edge Sealing vs. Live Edge Slab Sealing
Industrial panel sealing relies on thermomechanical application. Factories apply polymer or wood banding via automated systems to engineered wood. This highly controlled environment prioritizes speed, consistency, and volume. Conversely, live edge finishing involves manual application. Crafters use protective finishes like epoxy resins or polyurethane sealants. They aim to preserve and seal natural, irregular solid wood edges.
When selecting a process, analyze the substrate anatomy. Engineered panels demand automated panel finishing for structural integrity. Solid slabs require manual fluid-applied sealing to accommodate natural wood movement and irregular contours. You will never run a live edge slab through an automated edgebander. The machine requires perfectly straight, parallel edges to function.
Industrial machines operate at feed speeds ranging from 12 to 25 meters per minute. Manual finishing takes hours or days per piece. The industrial process uses hot melt adhesives that cure in seconds. Manual finishes require extended drying and curing times. Understanding this distinction prevents misapplication of technology and sets correct production expectations.
![Industrial Edge Sealing Equipment]()
Step-by-Step Technical Breakdown of the Edge Sealing Process
Pre-Milling and Substrate Preparation
The operation begins by squaring the panel. Diamond cutterheads remove saw marks and tear-out from previous sizing steps. This creates a perfectly flat surface. A flawless edge ensures 100% adhesive contact. Without proper pre-milling, micro-gaps allow moisture penetration and weaken the final bond.
Operators must set the pre-milling depth accurately. Typically, we remove 1mm to 2mm of material. This exposes a fresh, clean core for the adhesive to grip. Dull cutterheads cause chipping on the melamine surface. You must inspect the pre-milled edge before it reaches the glue roller. Any defects here will magnify in the final product.
We use counter-rotating cutterheads to prevent blowout at the trailing edge of the panel. The first cutterhead climbs the cut, and the second conventional cuts. This setup guarantees a crisp, square corner. Proper dust extraction at this station is mandatory. Sawdust on the edge prevents the adhesive from bonding to the wood fibers.
Adhesive Application and Edge Feeding
Next, the system manages temperature control within the glue pot and application roller. Precise thermal management prevents the adhesive from burning or cooling too quickly. The machine synchronizes the feed speed of the edge band material with the panel transit speed. This synchronization prevents stretching or bunching of the banding material.
The glue roller applies a precise amount of adhesive to the panel edge. We adjust the doctor blade to control the glue spread. Too much glue causes messy squeeze-out. Too little glue results in a weak bond. The application temperature usually sits between 190°C and 210°C for standard EVA adhesives.
The edge feeding magazine holds the coiled banding material. A guillotine cuts the banding to rough length as the panel passes. The timing of this cut must be exact. If it cuts too late, the banding falls short. If it cuts too early, you waste material and overwork the end-trimming saws.
The Pressing Zone
Once the adhesive coats the edge, the panel enters the pressing zone. The system utilizes a primary driven roller and secondary idle rollers. These rollers apply targeted, sequential pressure. This action ensures zero-gap bonding. It effectively eliminates trapped air pockets between the substrate and the banding.
The primary roller is usually larger and pneumatically driven. It makes the initial contact, forcing the banding into the hot adhesive. The secondary rollers are often tapered. They apply pressure to the top and bottom edges of the banding, ensuring tight seams. We adjust the pneumatic pressure based on the banding thickness and core density.
Insufficient pressure leads to a visible glue line and weak adhesion. Excessive pressure can crush the core of low-density particleboard. Operators must calibrate the pressing zone daily. We use a feeler gauge to check the gap between the rollers and the panel edge during setup.
Trimming, Scraping, and Profiling
The panel then moves through several cutting stations. End trimming involves precision cutting of leading and trailing edge overhangs. Flush trimming removes vertical overhangs to match the exact panel thickness. Finally, radius scraping removes chatter marks left by trimming cutters. This creates a smooth, tactile radius that feels finished to the touch.
The end-trimming saws ride on linear guides. They track the panel movement to make a perfectly square cut. The flush trimming motors spin at 12,000 to 18,000 RPM. They use carbide or diamond tooling to profile the top and bottom edges. We typically apply a 1mm or 2mm radius to thick PVC banding.
Radius scrapers act like hand planes. They shave a microscopic layer of plastic off the profiled edge. This removes the milling marks left by the high-speed cutters. Flat scrapers follow the radius scrapers. They remove any residual glue squeeze-out from the top and bottom surfaces of the panel.
Buffing and Final Panel Finishing
The final stage focuses on cleaning and polishing. The machine applies cleaning agents to remove residual adhesive squeeze-out. Cloth buffing wheels then restore the sheen to the edge material. This action ensures a clean transition line between the board face and the banded edge.
We use specific release agents before the pre-milling station to prevent glue from sticking to the panel face. At the buffing station, we apply cleaning agents to dissolve any remaining residue. The buffing wheels generate friction, which slightly melts the edge of the PVC, restoring its original color and gloss.
Proper buffing eliminates the white stress marks caused by the scraping knives. Operators must replace the cloth wheels regularly. Worn wheels fail to polish the edge and can leave dirty streaks on white melamine panels. This station is the final quality control checkpoint before the panel exits the machine.
Evaluating Edge Sealing Materials and Adhesives
Edge Banding Material Categories
Manufacturers choose from several distinct materials. pvc sealing remains the industry standard for commercial and residential cabinetry. It is highly durable, cost-effective, and available in infinite profiles. ABS (Acrylonitrile Butadiene Styrene) offers a chlorine-free, eco-friendly alternative. It features higher heat resistance and easier recycling capabilities. Wood veneer and solid wood cater to premium applications. These require specialized adhesive handling and post-application sanding.
PVC dominates the market due to its impact resistance and flexibility. It feeds easily through the machine and profiles cleanly. ABS behaves similarly to PVC but shrinks less under heat. This makes ABS ideal for furniture placed near ovens or radiators. Wood veneer requires careful handling. It is brittle and prone to splitting during the end-trimming process.
We also use melamine and paper-based edge banding for low-cost furniture. These materials are very thin, usually 0.4mm. They offer minimal impact resistance and are primarily used for hidden edges. Selecting the right material depends entirely on the final application and the expected wear and tear on the furniture piece.
Post-Processing Requirements for Wood Veneer vs. Synthetic Edges
Natural materials demand extra steps. Operators must implement profile sanding protocols to eliminate fibers on natural wood veneers. Following this, they apply primers, stains, or protective top-coats to raw wood edges. These coatings prevent color degradation and seal the porous wood grain. Synthetic edges typically bypass these steps, requiring only standard buffing.
When running wood veneer, we often disable the radius scrapers. The scrapers can catch the wood grain and tear the veneer off the core. Instead, we rely on fine-grit sanding blocks mounted on the machine. The sanding blocks smooth the trimmed edge without tearing the fibers.
Synthetic edges come pre-finished. The color and texture are consistent throughout the thickness of the material. If a PVC edge gets scratched, the color remains the same. If a stained wood veneer gets scratched, the raw wood underneath becomes visible. This makes synthetic edges much easier to process and maintain in high-volume production.
Adhesive Technologies: Trade-offs and Performance
Selecting the right adhesive defines the product lifespan. EVA (Ethylene Vinyl Acetate) offers low operational cost and easy cleanup. However, it remains vulnerable to reactivation under high heat and is susceptible to moisture penetration. PUR (Polyurethane) cures via chemical cross-linking with ambient moisture. It offers superior water and heat resistance. PUR creates a thinner, less visible glue line but requires strict glue pot maintenance.
Laser or Hot-Air systems utilize co-extruded edge bands. These bands feature a functional polymer layer activated by laser or hot air. This zero-joint technology delivers the highest aesthetic quality with no visible glue line. However, it requires significant initial capital expenditure.
We use EVA for standard office furniture and dry environments. We mandate PUR for kitchen cabinets, bathroom vanities, and laboratory furniture. The chemical bond of PUR cannot be reversed by heat, unlike EVA. If you ship EVA-banded furniture in a hot shipping container, the banding might peel off before it reaches the customer.
Adhesive Type
Moisture Resistance
Heat Resistance
Maintenance Level
Visual Quality
EVA
Low
Low
Low
Standard (Visible Line)
PUR
High
High
High
Excellent (Thin Line)
Laser / Zero-Joint
Maximum
Maximum
Low (Machine specific)
Flawless (No Line)
Sourcing and Scaling an Edge Sealing Machine
Capacity vs. Footprint Considerations
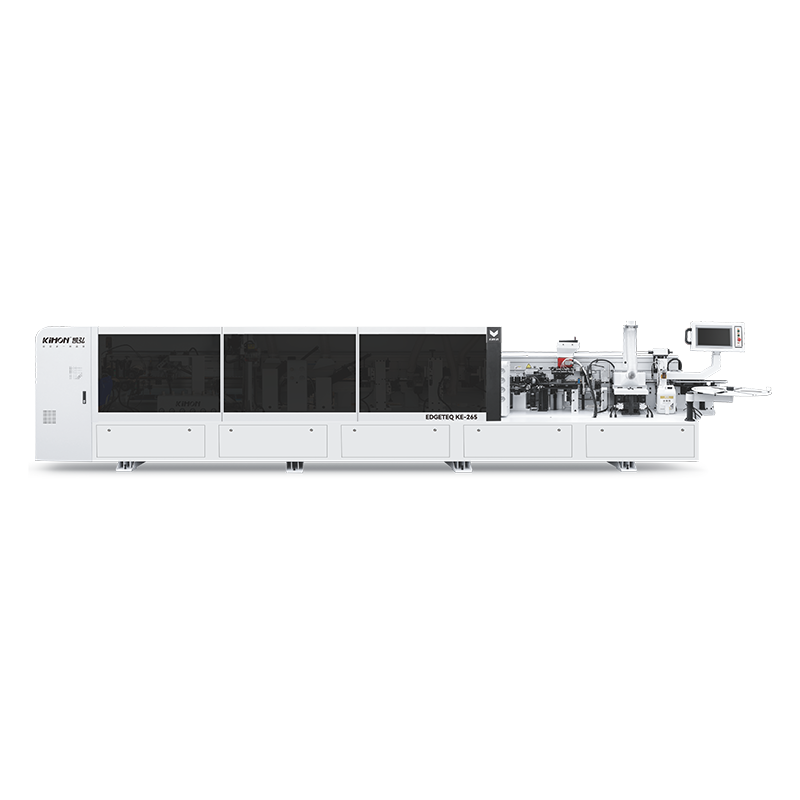
Selecting equipment requires analyzing your floor space and volume. Assess entry-level machines for basic gluing and trimming if you run single shifts with low volume. High-production automated lines suit continuous multi-shift operations. A robust edge sealing machine demands significant footprint, especially when incorporating panel return systems.
An entry-level machine might measure 3 meters in length. A fully equipped industrial line can exceed 10 meters. You must account for the infeed and outfeed clearance. If you process 2.4-meter panels, you need at least 15 meters of clear floor space. Cramping the machine leads to handling damage and operator fatigue.
Feed speed dictates capacity. A 12 meter-per-minute machine processes roughly 3,000 meters of edge per shift. A 25 meter-per-minute machine doubles that output. However, higher speeds require faster operator handling or automated return conveyors. Buying a fast machine without the material handling infrastructure is a waste of capital.
Feature-to-Outcome Mapping
Match machine features to your product catalog complexity. Evaluate the necessity of corner rounding units. These units prove essential for producing safe, finished cabinet doors. Multi-profile scrapers add value if you frequently switch between different edge thicknesses and radius profiles.
If you only produce square-edged shelves, you do not need corner rounding. If you manufacture high-end kitchen doors with 2mm PVC, corner rounding is mandatory. This unit uses specialized motors to trace the leading and trailing corners, applying a continuous radius. It eliminates sharp, dangerous corners on the finished product.
Multi-profile scrapers allow operators to switch from a 1mm radius to a 2mm radius via the control panel. Without this feature, the operator must manually change the scraper knives, which takes 15 minutes of downtime. In a high-mix production environment, automated profile switching pays for itself in weeks.
Automation and Labor Reduction
Modern facilities integrate return conveyors for single-operator workflows. This cuts labor requirements drastically. Barcode scanning and CNC integration allow automatic machine changeovers. This is crucial in batch-size-one production environments. Automated quality inspection utilizes optical sensors to detect micro-gaps and adhesive squeeze-out in real-time. This technology reduces scrap parts and rework significantly.
A return conveyor catches the panel as it exits the machine and brings it back to the operator. One person can band all four sides of a panel without walking. This reduces labor costs by 50% at this station. Barcode scanners read a label on the panel and automatically adjust the machine's pressure beams, trimming motors, and scrapers to the correct thickness.
Servo motors drive these automated adjustments. They position the cutting tools with 0.01mm accuracy. This eliminates human error during setup. When producing custom cabinets where every panel is a different size and thickness, servo-driven automation is the only way to maintain profitability and throughput.
Implementation Risks and Quality Control Mitigation
Diagnosing Common Cabinet Edge Process Defects
Defects disrupt the cabinet edge process. Thick glue lines usually stem from excessive adhesive application or insufficient pressing roller pressure. Edge peeling results from cold substrates, low glue temperature, or expired adhesive. Corner chipping frequently occurs due to dull trimming tooling or incorrect feed speeds. Identifying these root causes allows for rapid mechanical adjustments.
When troubleshooting, change only one variable at a time. If the edge is peeling, check the glue temperature first. If the temperature is correct, check the board temperature. Cold boards act as a heat sink, freezing the glue before it can penetrate the wood fibers. We use infrared thermometers to verify board temperatures before processing.
Snipe at the leading or trailing edge indicates a problem with the copy wheels on the trimming motors. The wheels guide the cutters along the panel surface. If the wheels are dirty or misaligned, the cutters will dig into the panel. Regular cleaning of the copy wheels prevents this expensive defect.
Defect
Probable Cause
Corrective Action
Thick Glue Line
Low roller pressure / Too much glue
Increase pneumatic pressure / Adjust doctor blade
Edge Peeling
Cold board / Low glue temp
Acclimatize boards / Check heating elements
Corner Chipping
Dull tooling / Fast feed speed
Replace cutterheads / Reduce feed speed
White Stress Marks
Aggressive scraping / Worn buffing wheels
Adjust scraper depth / Replace cloth wheels
Managing Environmental Variables
Factory conditions heavily influence output quality. Ambient temperature impacts the open time of the adhesive. If the factory is too cold, the glue sets before the pressing zone. Establish strict protocols for acclimatizing stored boards before processing. Bringing cold boards directly into a warm machine guarantees adhesion failure.
We recommend maintaining a factory temperature between 18°C and 25°C. If you store boards in an unheated warehouse during winter, you must bring them into the production area at least 24 hours before processing. Some advanced machines feature infrared heating lamps just before the glue roller to pre-heat the panel edge.
Humidity also plays a role, especially when using PUR adhesives. PUR requires ambient moisture to cure. In extremely dry environments, PUR takes longer to achieve its final bond strength. Conversely, high humidity can cause the composite boards to swell before they even reach the machine, ruining the pre-milling calibration.
Maintenance and Operator Training
Equipment longevity relies on disciplined maintenance. Establish strict cleaning protocols. This is especially vital for PUR systems, which require purging with cleaning agents before shutdown to prevent permanent curing in the pot. Develop preventative maintenance schedules for tooling sharpening and sensor calibration. Well-trained operators spot alignment issues before they ruin entire batches.
Daily maintenance includes blowing off dust from the sensors and linear guides. Operators must lubricate the chain track weekly. The chain track pulls the heavy panels through the machine. If it lacks lubrication, the panels will slip, causing uneven trimming and scraping.
We implement a strict tooling replacement schedule. We do not wait for the cutters to chip the melamine before changing them. We track the linear meters processed and replace the diamond tooling at predetermined intervals. This proactive approach eliminates unexpected downtime and maintains a consistent, high-quality edge.
Conclusion
Implement these steps to optimize your production and ensure a flawless edge on every panel:
Audit your current scrap rates to identify specific trimming or adhesion failures on the factory floor.
Conduct material adhesion tests with prospective equipment vendors using your exact substrates and banding materials.
Calculate the long-term ROI of upgrading from EVA to PUR technologies based on warranty claim reductions and improved moisture resistance.
Implement strict board acclimatization protocols in your staging areas to prevent cold-board adhesion failures.
Establish a daily preventative maintenance checklist focusing on glue pot cleaning and sensor calibration.
FAQ
Q: What is the difference between edge banding and edge sealing in furniture?
A: Edge banding refers to applying a physical strip of material to a raw panel edge. Edge sealing is the broader process of closing off that porous edge to prevent moisture ingress and VOC emissions, often achieved through automated banding.
Q: Which adhesive is best for a waterproof cabinet edge process?
A: PUR (Polyurethane) adhesive provides the best water resistance for standard machinery. It cures via a chemical reaction with moisture, creating a waterproof and heat-resistant bond ideal for kitchens and bathrooms.
Q: How does PVC sealing compare to ABS in panel manufacturing?
A: PVC is highly durable and cost-effective but contains chlorine. ABS is an eco-friendly, chlorine-free alternative that offers higher heat resistance and is easier to recycle, though it often costs slightly more.
Q: What causes edge banding to peel off over time?
A: Peeling usually results from poor initial adhesion. Common causes include applying adhesive at the wrong temperature, using cold substrates, insufficient roller pressure, or utilizing EVA glue in high-heat environments.
Q: How often should an industrial edge sealing machine be calibrated?
A: Basic calibration checks, like glue spread and roller pressure, should occur daily or during material changeovers. Comprehensive mechanical calibration and tooling inspections should follow the manufacturer's preventative maintenance schedule, typically monthly.
Q: Can you apply PUR adhesive with a standard EVA edgebander?
A: Generally, no. PUR requires specialized glue pots coated with Teflon and specific airtight melting units to prevent the adhesive from curing prematurely due to ambient humidity.

![English]()
![zhifufuben]()